

Quick Start
After installing Turbo Browser, follow these steps for basic setup.
1. Import from another browser
You can start import from either entry:
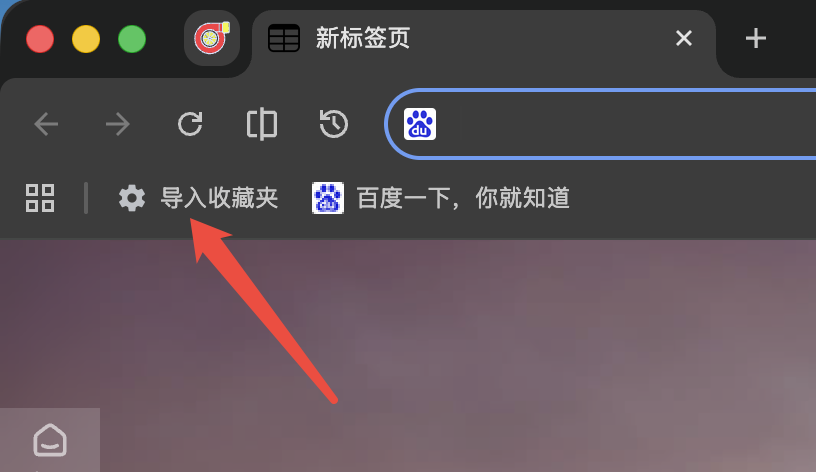
- Bookmarks bar — Click Import bookmarks
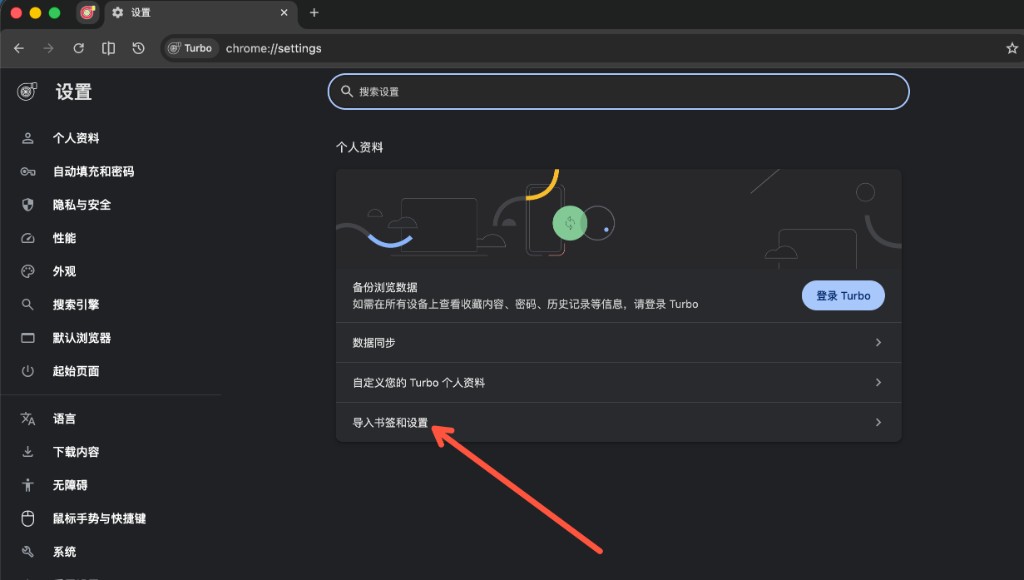
- Settings — Settings → Profile → Import bookmarks and settings
- Choose source: Chrome or Edge.
- Select bookmarks, passwords, autofill, extensions, etc. (extension import depends on the current build).
See Data Import for details.
2. Mouse gestures & boss key
- Open Settings, search for mouse gestures, or open the gestures panel.
- Enable gestures and review defaults; customize trail color, width, and action mappings.
- The default boss key is
Ctrl + Q(Control on both Windows and macOS) to hide or show the browser window; change it under Boss key in Settings.
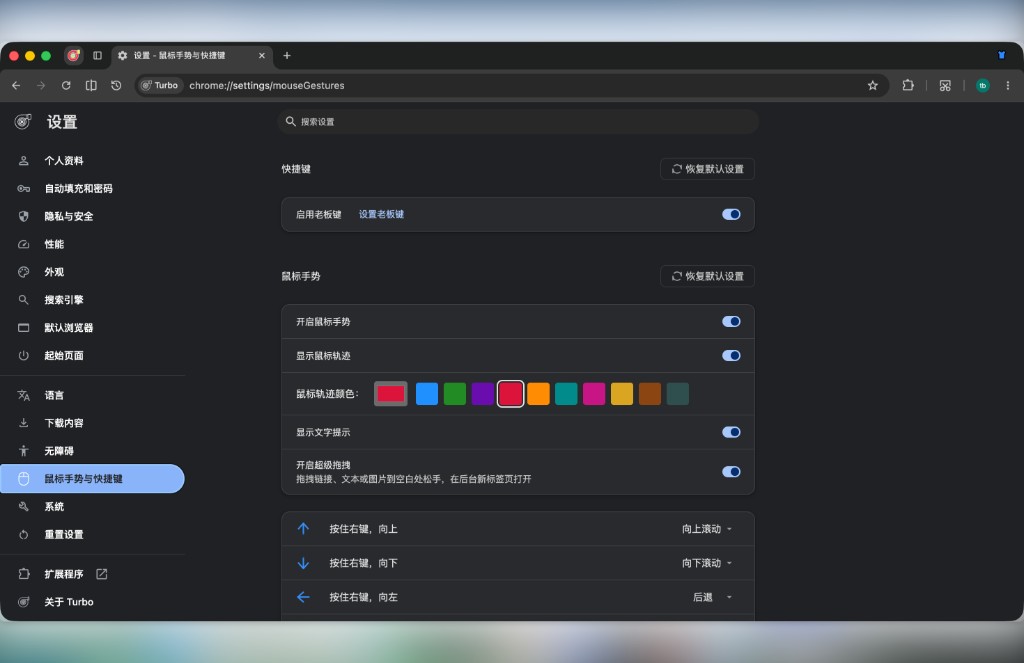
Mouse gestures & boss key: enable and customize the boss key, gesture trail, and action mappings in Settings
Full default mappings: Mouse gestures.
3. Screenshots
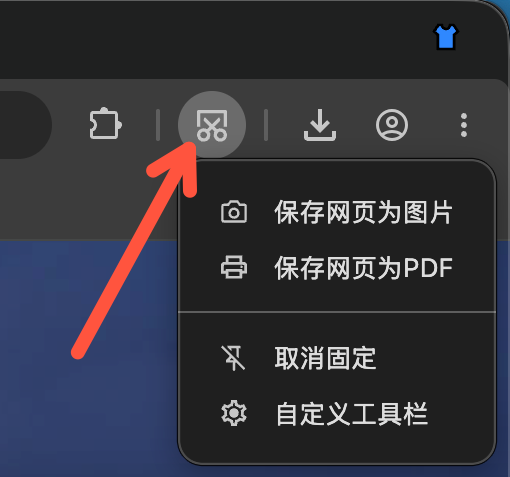
Turbo offers three capture modes. The toolbar screenshot button is the main entry:
- Left-click — Full-screen capture
- Right-click — Web page capture: save as image (including full page) or save as PDF
- Region capture — Press
Ctrl + Shift + X(Windows) orCmd + Shift + X(macOS) to select any area on screen.
Region capture on macOS may ask for Screen Recording permission the first time. See Screenshots and Shortcuts for details.
4. Tabs, address bar & appearance
- Use the Tab layout toggle on the left of the tab strip, or Settings → Tabs and bookmarks → Tab strip position, to switch horizontal/vertical tab layout; in vertical layout you can move the strip to the right. See Vertical tabs.
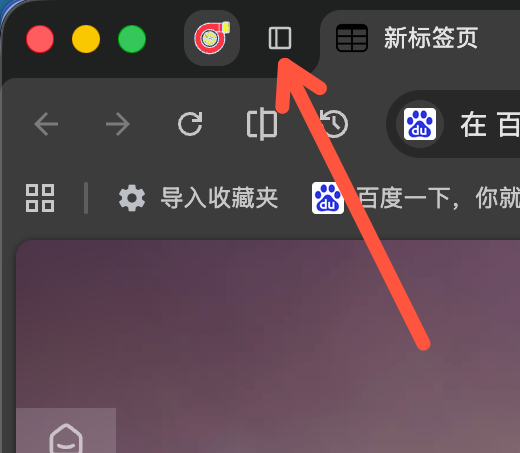
Vertical tabs: click the button on the left of the tab strip, or change tab position in Settings
- Toolbar Split view: split the window into two side-by-side panes. See Productivity → Split view.
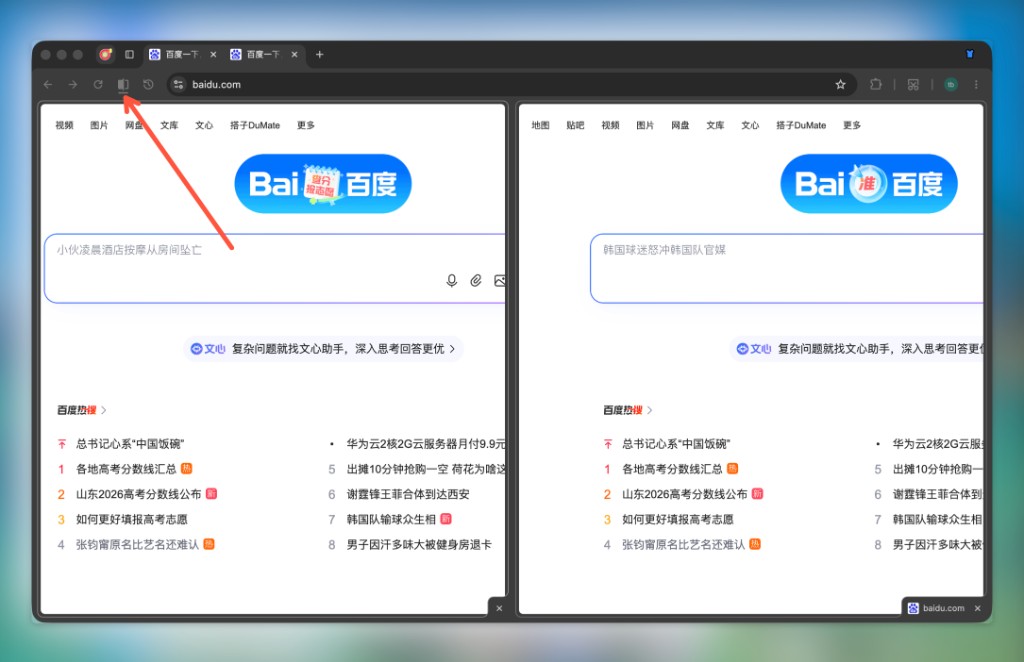
Split view: click the toolbar split button for two independent panes
- Right-click the tab strip New tab (+) button: Paste and open — opens a clipboard URL, or searches plain text with the default engine; toggle in Settings → Tabs and bookmarks. Use the app menu or
Ctrl+M/⌃⌘Mfor small account tabs. See Small account tabs. - Toolbar Restore page: left-click restores the most recently closed tab; right-click shows recent-closed items grouped by window / group / split view and opens in the current window.
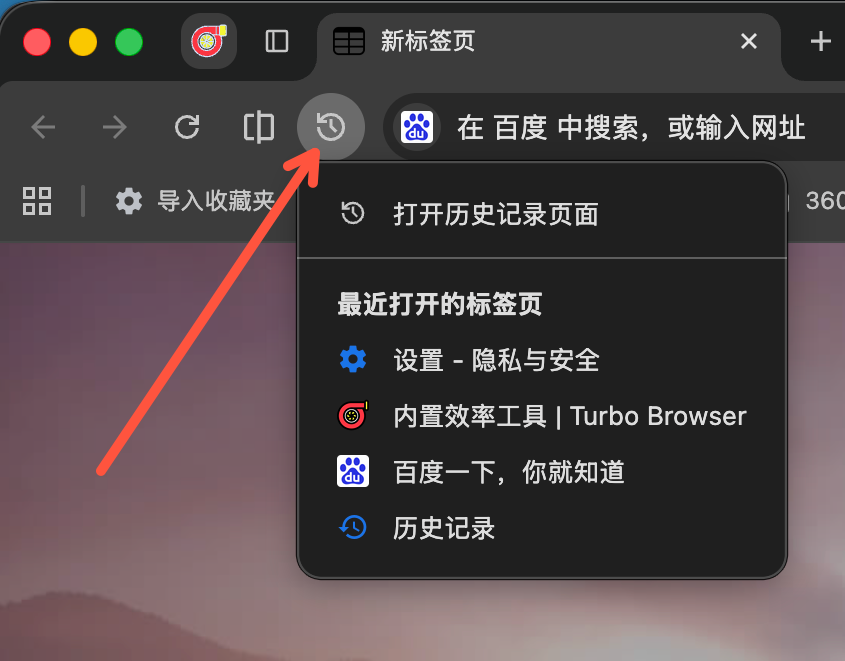
Restore page: left-click restores the most recently closed tab; right-click shows a window / group / split-view hierarchy
- Double-click a tab to close it; what happens when you close the last tab is in Settings → Tabs and bookmarks (default: open a new tab first). See Tabs → Close last tab.
- The new tab page is the Chromium default (Most visited can be toggled); Settings → On startup — default or a custom URL. See Tips → New tab page.
- Hover icons on the right of the address bar: Copy link, Scan QR code to share the current page.
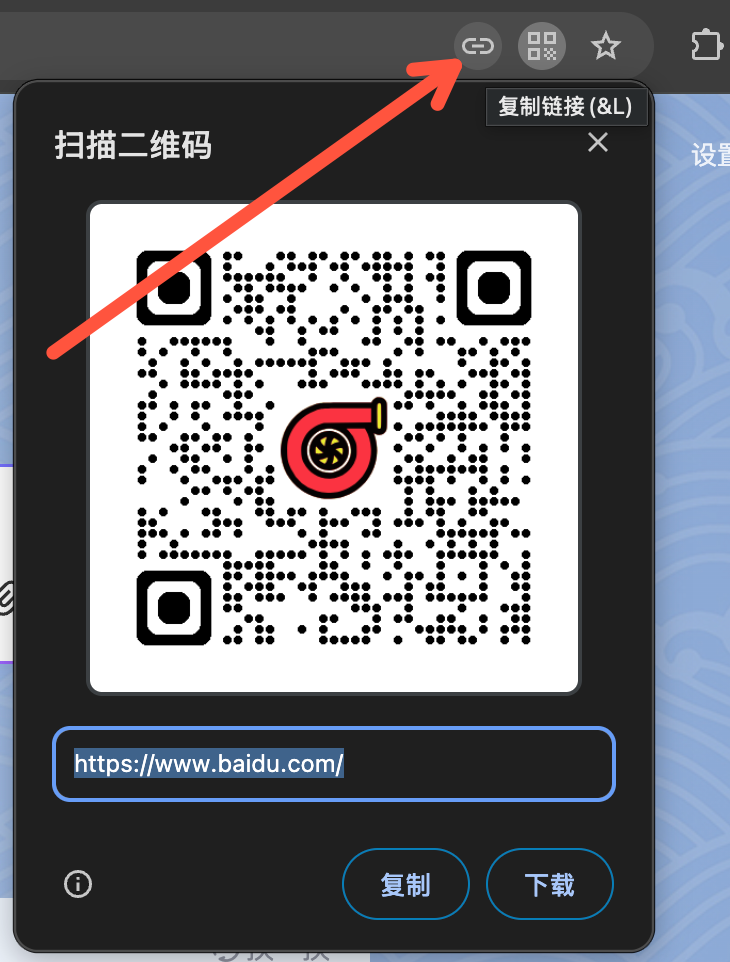
Address bar: hover the copy-link or QR code icon to quickly copy the link or share the page
- Title bar Appearance switches browser colors in one click; Themes opens the Edge theme store for more themes. See Productivity → One-click themes.
5. Immersive mode
For a larger content area, turn on Immersive mode: the tab strip and toolbar auto-hide; move the pointer to the top of the window to reveal them again.
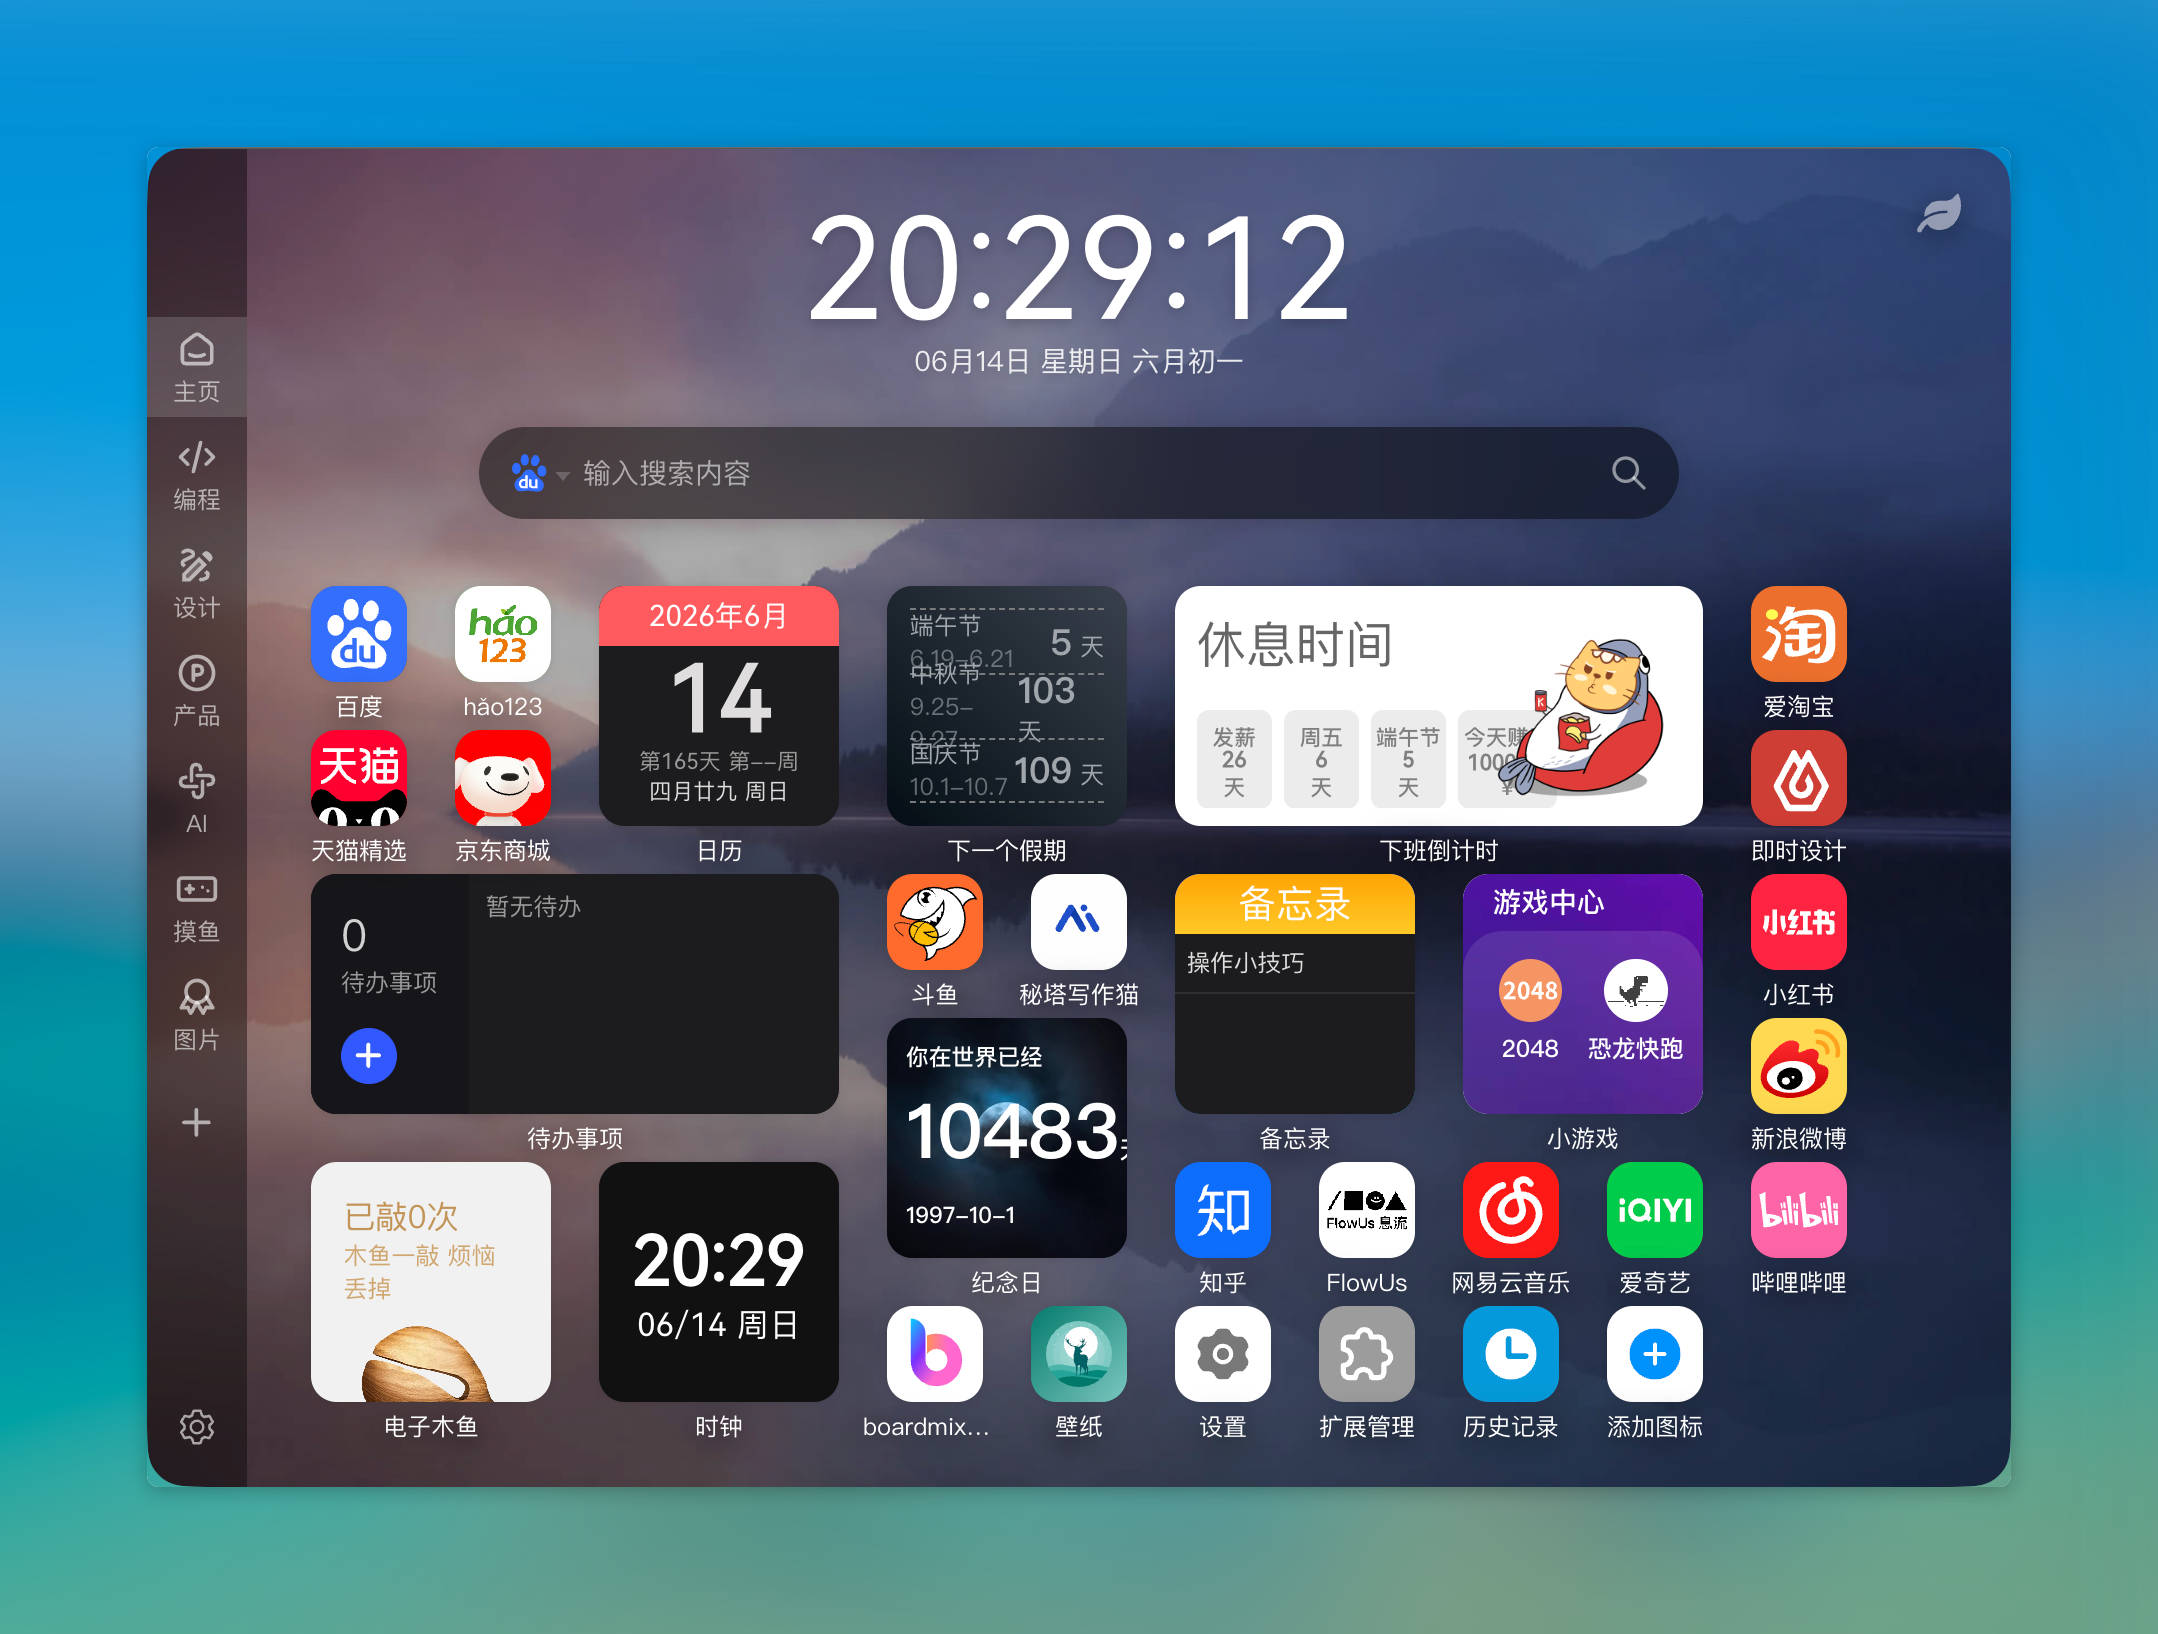
Immersive mode: tab strip and toolbar auto-hide for a larger content area; move the pointer to the top of the window to reveal the UI
- Toggle under Settings → Appearance, or press
Ctrl + F11(macOS:Cmd + F11) - Also available from the browser menu and the macOS View menu
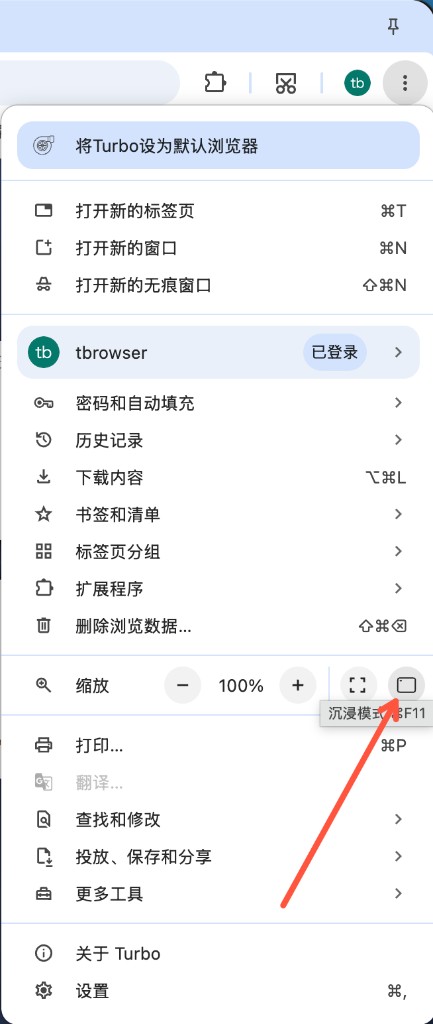
Menu → Zoom row → Immersive mode
- Keep window on top — always available on the title bar in immersive mode; outside immersive mode you can show it via Customize toolbar (no need to enter immersive mode)
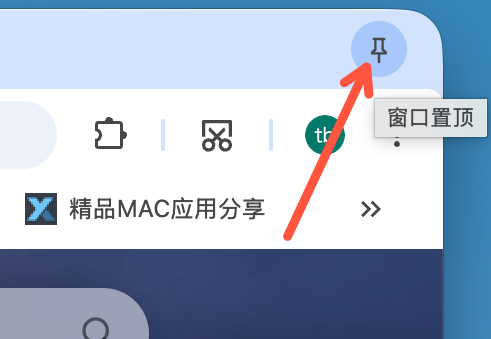
Keep window on top: title-bar pin; also available in Customize toolbar
Full details: Immersive mode.
6. Sign in and sync
Sign in to sync bookmarks, passwords, and more — easier to restore after switching devices or reinstalling.
- Click the avatar in the top-right and choose Turbo account or Google account.
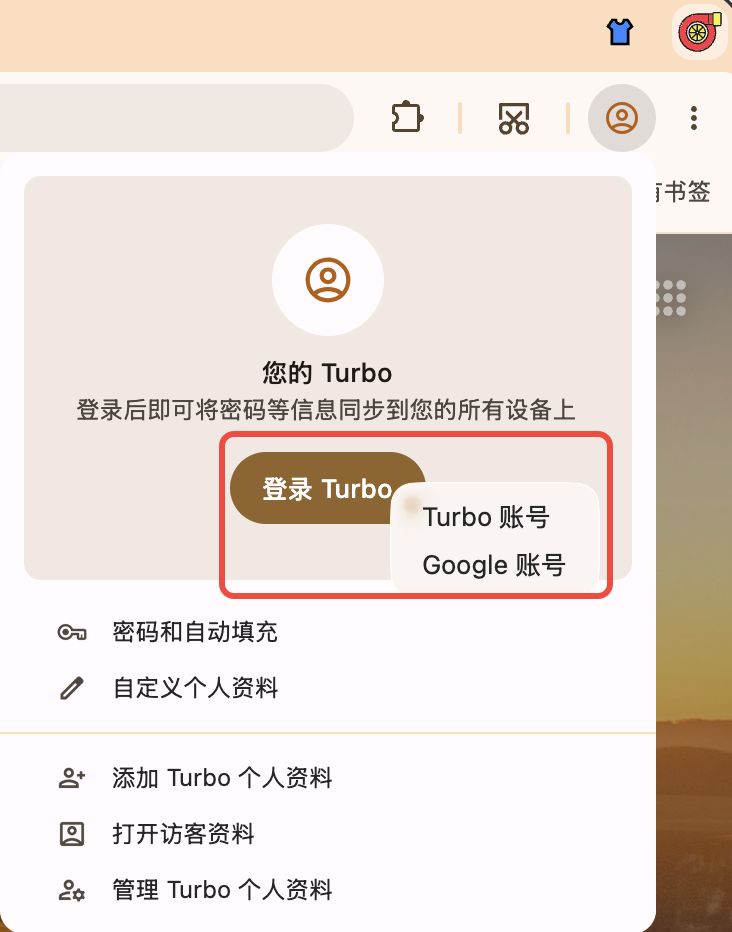
Dual sign-in: switch Turbo or Google account from the avatar menu, sign-in page, browsing data page, or history page
- Open Settings → Sync and enable items as needed. Turbo accounts can sync bookmarks, passwords (including Passkeys), browser settings, extensions, and NTP My shortcuts (incremental sync; does not sync browsing history; bookmarks and passwords can be toggled separately); Google accounts use Google Sync.
- First sync may take a few minutes — keep a stable network connection.
TIP
Sync requires a network connection and a signed-in Turbo or Google account. If it fails, check network and account status, then retry later. See Sync for details.
7. Stores & extensions
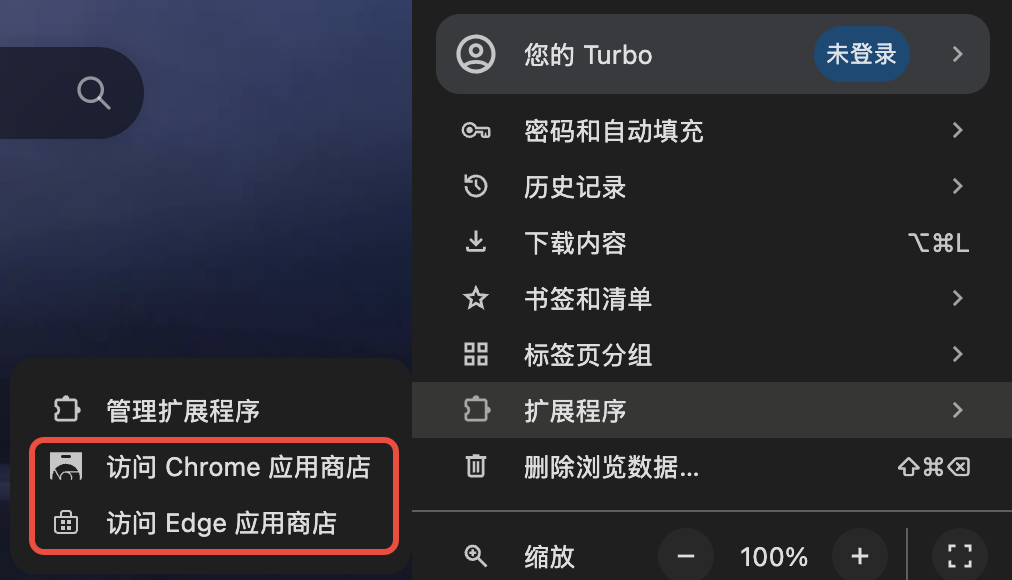
- Open Menu → Extensions to visit the Chrome Web Store or Microsoft Edge Add-ons.
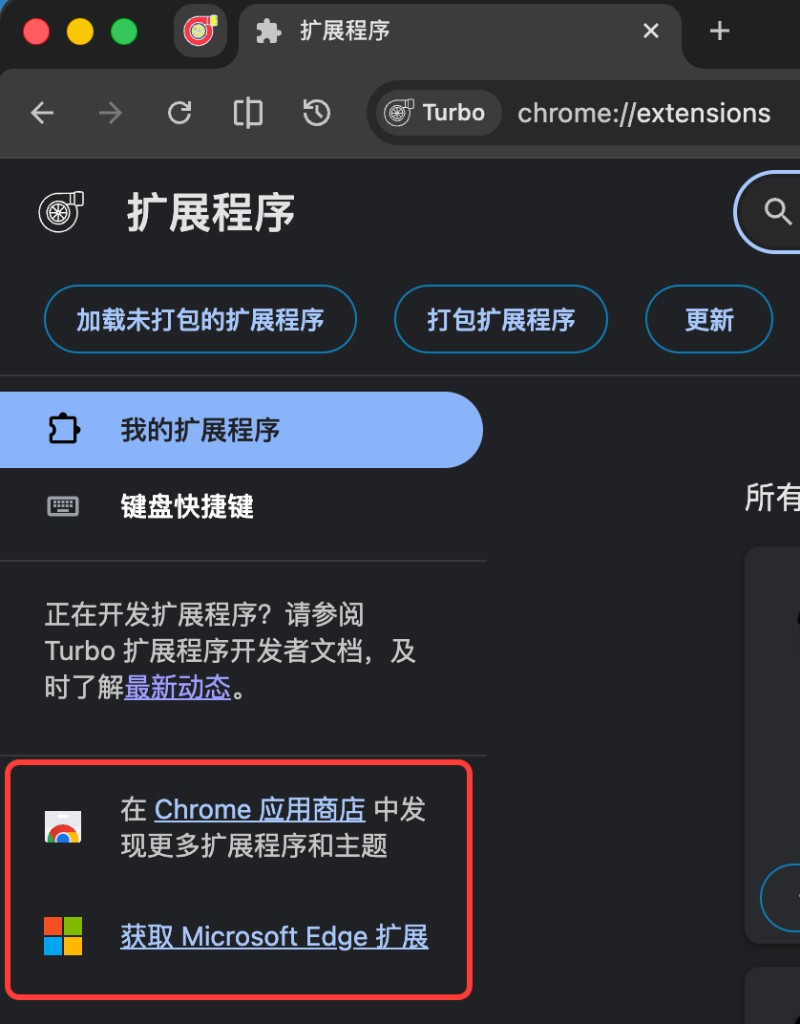
- Or open the Extensions page (
chrome://extensions) and use the store links at the bottom; the sidebar also opens Crx搜搜 for one-click.crxinstall.
Right-click a toolbar extension to disable it; re-enable from Disabled extensions in the puzzle menu. See Extensions.
AdGuard
Click the button below to download the extension and follow the browser prompt. See Extensions → AdGuard.
Web translation
Built-in translate: Use the page context menu or the right side of the address bar for whole-page translation.
For bilingual reading and more advanced features, install Immersive Translate. See Extensions → Web translation.
8. Parallel download acceleration
Open Settings → Downloads (or chrome://settings/downloads) and confirm Enable parallel download acceleration (on by default). Large downloads are usually faster; turn it off temporarily if a site misbehaves.
The same page also covers third-party download tools (detects 9) and Alt + left-click quick-save images. Full guide: Download enhancements.
9. Network proxy
To use the system proxy or a custom proxy, open Settings → System:
- Enable Use system proxy to follow OS proxy settings
- When disabled, click Custom proxy to set the server and bypass list
- On the same page, turn on Use a custom cache location to pick a cache folder (restart required)
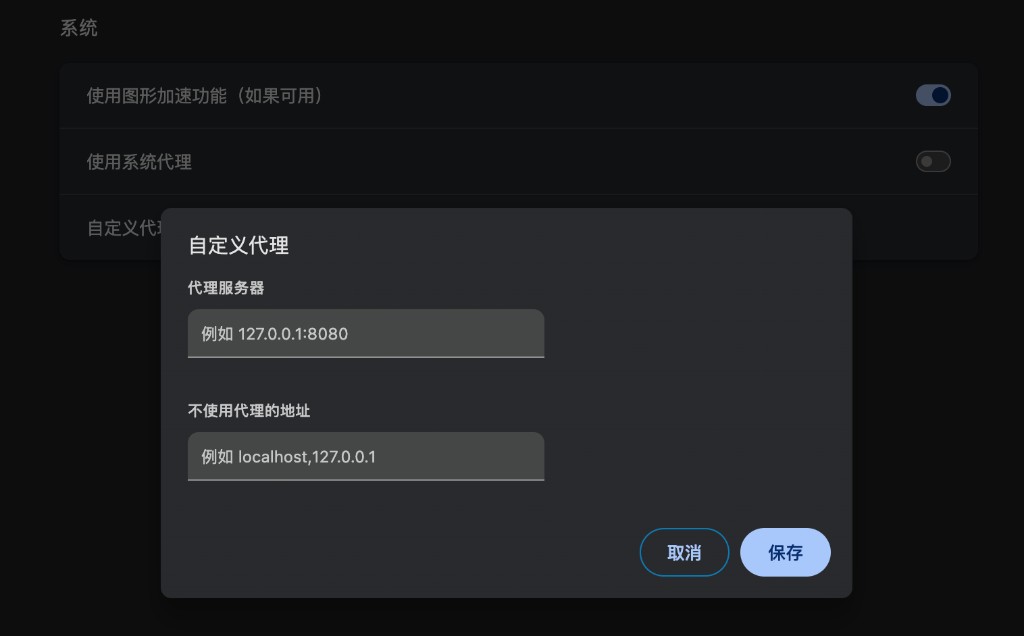
Network proxy: enable system proxy in Settings → System, or configure a custom proxy server and bypass list
See Features → UI & productivity for details.
10. Check for updates
Turbo includes built-in update checks. You can also download the latest installer from Download, or see the Changelog.
For gestures and shortcuts, see Mouse gestures and Shortcuts; for quick tips, see Practical tips; for FAQ, see Help Center.